If job searching feels like throwing applications into a black hole, it’s not just you. Jobscan reports that 98.4% of Fortune 500 companies use an Applicant Tracking System (ATS)—that’s 492 out of 500—which helps explain why the process can feel impersonal and hard to track. (Source: Jobscan, “State of the Job Search” / ATS research: https://www.jobscan.co/state-of-the-job-search and related ATS explainer: https://www.jobscan.co/blog/8-things-you-need-to-know-about-applicant-tracking-systems/)
Meanwhile, hiring can take long enough that you need a system. SHRM-reported metrics cited by SHRM show average time-to-fill dropping from 48 days (2023) to 41 days (2024)—still well over a month. (Source: SHRM: https://www.shrm.org/topics-tools/news/talent-acquisition/recruiters-express-optimism-for-2025)
A good tracker doesn’t “organize your chaos.” It does something more useful:
- Tells you what to do next
- Prevents duplicate applications
- Creates follow-up timing
- Shows what’s working (sources, roles, resume versions)
This guide is for high-volume applicants who are tired of bloated spreadsheets that collapse after 30 rows.
In this guide, you’ll learn:
- The core job tracker columns you actually need (12 columns that cover 95% of use cases)
- Which “nice-to-have” columns are worth adding (and when)
- A simple way to make your tracker follow-up driven, not “data entry driven”
- Example layouts for spreadsheet, Notion/Trello, and job tracker apps
- Tools that reduce manual work (including an option for tracking by forwarding emails)
What “job tracker columns you actually need” really means
Most trackers fail for one of two reasons:
- They track too much. You build a “perfect” spreadsheet… then stop using it because every application requires 3 minutes of logging.
- They track too little. You track only company + role + date… then realize you can’t remember where you applied, who you talked to, or what to do next.
So “columns you actually need” = the smallest set of fields that still enables decisions.
A useful job tracker answers these questions quickly:
- What did I apply to—and when?
- What stage is it in right now?
- What’s the next action, and when should I do it?
- Where did I find the role (so I can do more of what works)?
- Do I have a link to the posting (so I can prep fast)?
- Did I tailor my resume/cover letter (so I can replicate wins)?
Why tracking matters more in 2026 (with real data)
Here are the stats that justify building a tracker that’s more than a list:
-
ATS is nearly universal in big-company hiring.
Jobscan: 98.4% of Fortune 500 companies use an ATS (492/500).
Source: https://www.jobscan.co/state-of-the-job-search -
Hiring takes weeks, so “no response yet” isn’t automatically a no.
SHRM: average time-to-fill reportedly 41 days in 2024 (down from 48 in 2023).
Source: https://www.shrm.org/topics-tools/news/talent-acquisition/recruiters-express-optimism-for-2025 -
Many candidates hear back within 1–2 weeks—but not all.
Indeed reports (candidate experience data) that 37% hear back within one week, 44% within a couple of weeks, and 4% within one day.
Source: Indeed career advice summary: https://www.indeed.com/career-advice/finding-a-job/how-long-should-you-wait-to-hear-back-about-a-job -
Hiring process length has been measured at a few weeks on average.
Glassdoor: the average U.S. hiring process is about 23.8 days (as reported by Glassdoor Economic Research in their guidance).
Source: https://www.glassdoor.com/blog/how-long-should-interviews-take/ -
Competition per role can be brutal—especially for corporate postings.
A widely-cited benchmark: ~250 resumes per corporate job opening (often attributed to Glassdoor data and cited by business publications).
Source example: Inc: https://www.inc.com/peter-economy/19-interesting-hiring-statistics-you-should-know.html
(Note: this number varies significantly by role, seniority, and remote vs. onsite.) -
Government data supports the idea that outcomes vary wildly—and tracking helps you see your personal funnel.
BLS analysis examines applications and interview outcomes and shows wide ranges depending on how many applications are submitted and other factors.
Source: BLS Beyond the Numbers: https://www.bls.gov/opub/btn/volume-9/how-do-jobseekers-search-for-jobs.htm
Bottom line: If the process takes weeks and involves high volume, you need a system built for follow-ups and decisions, not perfection.
The 12 job tracker columns you actually need (the “Core 12”)
If you only build one tracker, make it this. These columns are optimized for:
- speed of entry
- next-step clarity
- basic analytics later
Core identity + retrieval (so you can find things fast)
-
Company
Why it matters: everything else hangs off it.
Format: text (normalize names: “Google” not “Google LLC - Mountain View”). -
Role / Job Title
Why it matters: prevents “what was this again?” later.
Format: text. -
Location / Work Mode (Remote/Hybrid/Onsite + city)
Why it matters: you’ll forget which roles required relocation or in-office days.
Format: text or dropdown. -
Job Link (URL)
Why it matters: crucial for interview prep, re-reading requirements, and salary/level details.
Format: URL.
Timeline + status (the engine of the tracker)
-
Date Added (the day you found it)
Why it matters: lets you measure how long roles sit before you apply (and prevents missed deadlines).
Format: date. -
Date Applied
Why it matters: enables follow-up timing and funnel metrics.
Format: date (blank until applied). -
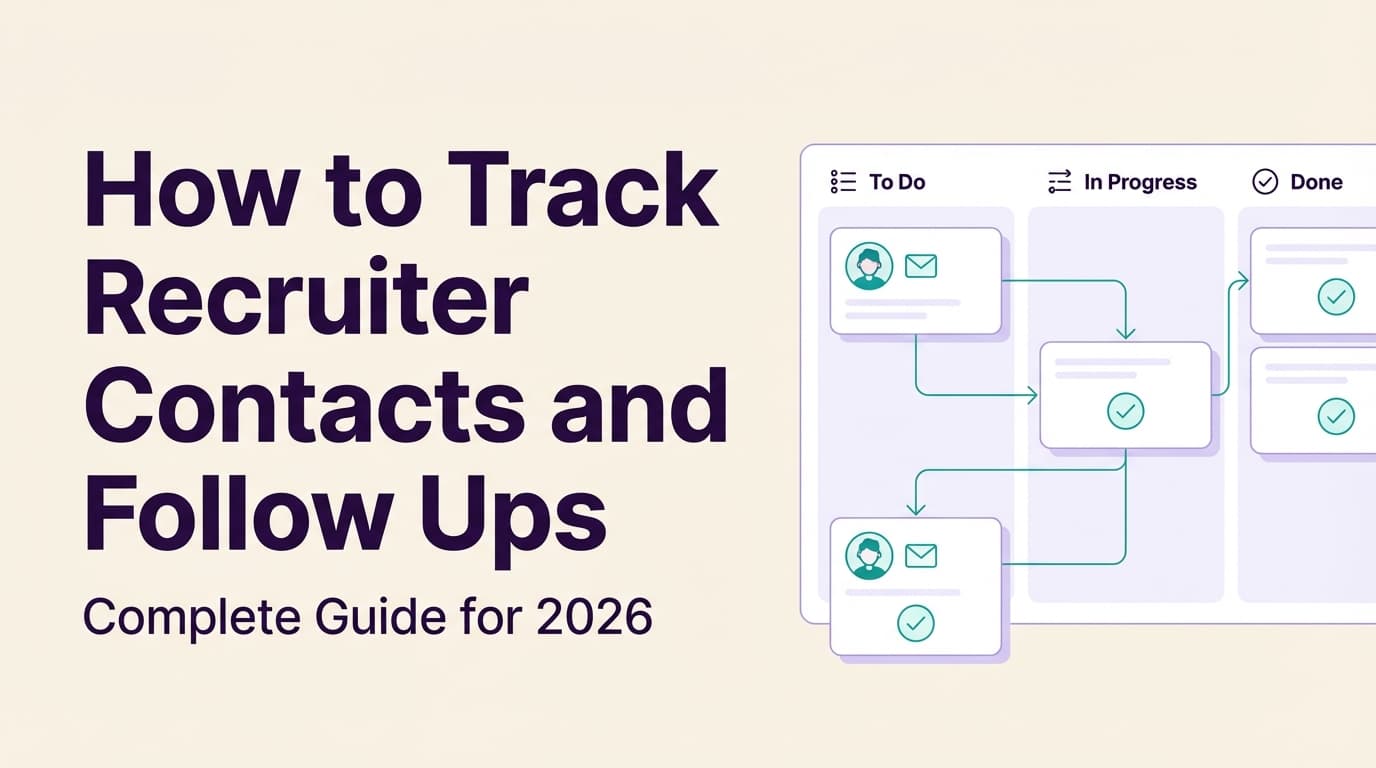
Status / Stage (dropdown)
Keep it simple. Suggested stages:
- Interested
- Applied
- Recruiter Reached Out
- Interviewing
- Rejected
- Offer
- Accepted
- Archived / Not pursuing
Why it matters: you need a single “truth” field for sorting and filtering.
Tip: If you prefer more detail, don’t explode your status list. Add a separate “Interview Round” field later (optional columns section).
- Next Action (the one next thing)
Examples:
- “Follow up via email”
- “Schedule recruiter screen”
- “Send portfolio”
- “Prep for onsite”
- “Ask for referral”
Why it matters: this is where trackers become actionable, not archival.
- Next Action Date
Why it matters: your tracker becomes a daily task list when you sort by this.
Source + leverage (so you can do more of what works)
-
Source (LinkedIn, company site, recruiter, referral, Slack group, etc.)
Why it matters: later you’ll learn “recruiter intros convert 4x better for me” (or whatever is true for you). -
Contact (name + role + email/LinkedIn)
Why it matters: searching your inbox at interview time is painful; keep it here.
Context (so future-you doesn’t hate past-you)
- Notes
Keep it lightweight:
- comp band if mentioned
- tech stack
- visa requirement
- anything unusual about the process
- “Applied with Resume v3”
The “Optional 8” columns (add only when you hit specific pain points)
These are common columns—but you should add them only when you can explain what decision they enable.
Optional columns for follow-up + accountability
A) Last Contacted Date
Use when: you’re networking heavily or juggling multiple recruiter threads.
B) Follow-up Count (0,1,2…)
Use when: you tend to over-follow-up (or never do).
Optional columns for interview management (without turning into chaos)
C) Interview Date
Use when: your calendar is busy and you want one view of interview load.
Important: don’t overpromise what tools do—many trackers show interview text, but not true calendar integration.
D) Interview Round (1,2,3,Final)
Use when: you’re in multiple pipelines simultaneously.
Optional columns for decision-making + negotiation
E) Comp Range (or “Target”)
Use when: you’re optimizing for pay/level.
Format: “$120–150k base” or “L4”.
F) Priority (High/Med/Low)
Use when: you have too many “maybes” and need to protect time.
Optional columns for ATS + tailoring hygiene
G) Resume Version
Use when: you tailor resumes and want to connect outcomes to versions.
H) JD Keywords / Must-haves
Use when: you’re doing keyword-driven tailoring and want to ensure you’re hitting the role’s language.
Example: a clean tracker layout (copy/paste headers)
Here’s a practical header set you can paste into Google Sheets, Excel, Airtable, or Notion.
Core 12 headers:
- Company
- Role
- Location/Work Mode
- Job Link
- Date Added
- Date Applied
- Status
- Next Action
- Next Action Date
- Source
- Contact
- Notes
Optional headers (add later):
- Last Contacted
- Follow-up Count
- Interview Date
- Interview Round
- Comp Range
- Priority
- Resume Version
- JD Keywords
How to set up your tracker (step-by-step)
Step 1: Decide what your tracker is for (and what it’s not)
Pick one primary purpose:
- High-volume pipeline: minimize logging time, maximize follow-ups
- High-intent targeting: fewer roles, deeper research, heavier notes
- Networking-first search: contact management + referral tracking
If you try to build one tracker for all three, you’ll end up with 30 columns and no habit.
Pro tip: Your tracker should take under 30 seconds to update per application. If it takes longer, you’ll abandon it.
Step 2: Use dropdowns for Status (and keep the list short)
Dropdowns prevent typo chaos like:
- “Interview”
- “interview”
- “Interviewing”
- “interviews”
- “2nd round”
A short list also makes filtering useful.
Step 3: Make “Next Action Date” the default sort
If you do nothing else, do this.
Every morning:
- Filter out “Rejected / Archived / Accepted”
- Sort by Next Action Date (ascending)
- Do the top 3 actions
This is how a tracker turns into momentum.
Step 4: Add a follow-up rule that matches real response timing
Indeed’s candidate response timing breakdown is a helpful baseline: 37% within one week and 44% within a couple of weeks (Source: https://www.indeed.com/career-advice/finding-a-job/how-long-should-you-wait-to-hear-back-about-a-job). That suggests your follow-ups should be planned—not random.
A simple, reasonable follow-up schedule:
- Follow-up #1: 7 business days after applying (if no confirmation or no movement)
- Follow-up #2: 7–10 business days after follow-up #1 (optional)
- Stop after 2 follow-ups unless you have a warm connection
Reality check: Some recruiters dislike unsolicited follow-ups; others appreciate them. Your tracker is how you learn which approach works for your target companies and roles.
Step 5: Add conditional formatting so overdue actions scream at you
This is the easiest automation you’ll ever do.
In Excel, conditional formatting can highlight dates that are overdue. Microsoft’s official guide:
https://support.microsoft.com/en-us/office/use-conditional-formatting-to-highlight-information-in-excel-fed60dfa-1d3f-4e13-9ecb-f1951ff89d7f
Simple approach:
- Red fill if Next Action Date < TODAY() and Status is not Closed
- Yellow fill if Next Action Date is within next 2 days
Now your tracker behaves like a dashboard instead of a table.
“Columns people add that you probably don’t need” (yet)
These aren’t bad columns—they’re just high effort / low return for most applicants.
1) “Job Description (full paste)”
Why it fails: pasting full JDs bloats the sheet and makes updating slower.
Better: store the Job Link and a few JD Keywords / Must-haves.
2) “Everything about the company”
Why it fails: becomes research homework.
Better: add a short note like “Series B, 60 ppl, AI infra, referral from Sam.”
3) “Cover letter status”
Why it fails: it’s often binary and rarely worth tracking.
Better: track “Materials sent” only if the role requires a portfolio or writing sample.
4) “Exact number of applicants”
Why it fails: LinkedIn numbers can be misleading; they may reflect clicks or starts, not true completed submissions (and people debate its accuracy heavily).
Better: track what you can control—tailoring, source, follow-up, and referral routes.
Best practices: how to keep your tracker from becoming a second job
1) Treat the tracker like a queue, not a journal
If your “Notes” cell becomes a diary entry, you’ll burn out. Keep notes short and decision-oriented.
2) Use one tracker for applications and a separate one for networking (if needed)
If networking is a big part of your strategy, split them:
- Tracker A: applications
- Tracker B: people/contacts
Otherwise you’ll ruin both.
3) Standardize your Company names
This matters later for analytics:
- “Amazon” vs “Amazon Web Services” vs “AWS”
Pick a standard and stick to it.
4) Always capture “Source”
This is the column that unlocks improvement. Over time you’ll discover patterns like:
- “Company site applications have higher response rate for me than LinkedIn Easy Apply”
- “Recruiter DMs convert better than cold apps”
5) Always capture “Resume Version” if you tailor
If you do any tailoring at all, add a lightweight “Resume Version” column (even if it’s just v1/v2/v3).
This is how you stop guessing what’s working.
How to measure whether your tracker is working (simple metrics)
You don’t need a complex dashboard. Start with three ratios:
- Response rate = responses / applications
- Interview rate = interviews / applications
- Offer rate = offers / interviews
If you want context for why these matter: job competition can be high (e.g., the commonly cited “250 resumes per corporate opening” benchmark) (Source: https://www.inc.com/peter-economy/19-interesting-hiring-statistics-you-should-know.html), so small improvements compound.
Actionable interpretation:
- Low response rate → improve targeting, resume/keywords, referrals
- Good response rate but low interviews → screening/phone interview prep
- Good interviews but low offers → final rounds, storytelling, negotiation, practice
Spreadsheet vs Notion/Trello vs job tracker apps: which is best?
Spreadsheets (Google Sheets / Excel)
Best for:
- speed
- filtering
- simple analytics
- full control
Downside:
- manual entry burden unless you automate part of the intake
Notion / Trello boards
Best for:
- visual pipeline stages
- “kanban” feel
- notes and research
Downside:
- easy to overbuild (templates get complex fast)
Job tracker apps
Best for:
- reducing manual entry
- reminders and workflow
- centralizing contacts/documents (varies by tool)
Downside:
- paid tools often gate the features you want most
- portability can be harder than a spreadsheet
A competitor comparison article that covers the “apps vs spreadsheets” decision:
Careerflow: https://www.careerflow.ai/blog/job-tracker-apps-vs-spreadsheets
Tools to help with job tracking (honest recommendations)
If you want the simplest: Google Sheets / Excel
- Works for almost everyone
- Easiest to customize
- Pairs well with conditional formatting
If you want templates: BeamJobs (Google Sheets templates)
BeamJobs provides editable tracker templates (useful if you want a fast start):
https://www.beamjobs.com/career-blog/job-application-tracker-google-sheets
If you want automation: JobShinobi (email-forwarding tracking + job tracker)
If your biggest pain is manual logging, JobShinobi is built around reducing that—specifically via email intake:
- Job application tracker (CRUD + realtime updates)
- Excel (.xlsx) export
- Optional automation via forwarded emails: you forward job-related emails to your unique JobShinobi address, and the system parses key details and logs/updates your application
Important accuracy notes:
- Email-based processing requires JobShinobi Pro (the API enforces Pro membership).
- JobShinobi Pro pricing is $20/month or $199.99/year.
- The pricing page mentions a “7-day free trial,” but trial enforcement mechanics are not clearly verifiable in code—so treat it as “mentioned,” not guaranteed.
(Internal links you can use if you’re already a user: Job tracker: /dashboard/job-tracker)
Common mistakes to avoid (that sabotage most trackers)
Mistake 1: Tracking outcomes but not actions
If you only track “Status,” you’re basically watching paint dry.
Fix: add Next Action + Next Action Date.
Mistake 2: Too many custom statuses
A status list with 25 entries becomes impossible to maintain.
Fix: keep 6–9 statuses max, and use Notes for nuance.
Mistake 3: Not saving the job link
You will need it later (interview prep, requirements, salary band, team info).
Fix: make Job Link mandatory.
Mistake 4: No “Source” column
Without source, you can’t improve your strategy—only your workload.
Fix: add Source; keep options simple.
Mistake 5: Treating “No response” as a status you update every day
This creates pointless churn.
Fix: plan follow-up dates; don’t touch the row until then.
Advanced setup: formulas you can add in 10 minutes
1) “Days Since Applied”
Useful for prioritizing follow-ups.
- Excel:
=TODAY()-[@[Date Applied]] - Google Sheets:
=TODAY()-F2(adjust column)
2) “Auto Follow-up Date”
If Date Applied exists, set follow-up in 7 business days.
Google Sheets example (business days):
=IF(F2="",,WORKDAY(F2,7))
3) “Overdue?”
=IF(I2<TODAY(),"OVERDUE","")
Then conditional format “OVERDUE” rows.
A quick “column decision tree” (so you don’t overbuild)
Add a column only if you can answer:
- What decision does this enable?
- Will I actually fill it in within 30 seconds?
- Can it be derived later from another field? (Example: job description can be revisited via Job Link.)
If you can’t answer those, skip the column.
Key takeaways
- The job tracker columns you actually need aren’t “everything you can track”—they’re the smallest set that drives next actions.
- Start with the Core 12: Company, Role, Location, Link, Date Added, Date Applied, Status, Next Action, Next Action Date, Source, Contact, Notes.
- Add optional columns only when you hit a real pain point (interview scheduling, tailoring, comp decisions).
- Build around known timing realities: ATS prevalence (Jobscan), multi-week hiring timelines (SHRM, Glassdoor), and typical response windows (Indeed).
- If manual logging is what breaks your habit, consider automation (e.g., email-forwarding-based tracking) instead of adding more columns.
FAQ (People Also Ask–style)
What information should be included in a job tracker?
At minimum: Company, Role, Job Link, Date Applied, Status, and Next Action/Next Action Date. If you include only one “extra” field, make it Source—it’s the fastest path to improving results over time.
What are the best columns for a job application tracking spreadsheet?
A practical set most job seekers can maintain:
- Company, Role, Location/Work Mode, Job Link
- Date Added, Date Applied, Status
- Next Action, Next Action Date
- Source, Contact, Notes
How do you create a job tracker in Google Sheets?
Create headers (start with the Core 12), then:
- Add dropdown validation for Status
- Freeze the header row
- Add conditional formatting on Next Action Date
- Filter out closed statuses and sort by Next Action Date daily
(Templates can help you start quickly, but keep the column set minimal.)
How do I track follow-ups after applying for jobs?
Use two columns:
- Next Action = “Follow up”
- Next Action Date = typically 7 business days after applying (adjust based on the company’s process)
Indeed-reported data suggests many candidates hear back within 1–2 weeks, which supports setting intentional follow-up windows. Source: https://www.indeed.com/career-advice/finding-a-job/how-long-should-you-wait-to-hear-back-about-a-job
How many days after applying should you follow up?
A common baseline is about one week (or ~7 business days), unless the posting specifies a timeline. If you have a referral or warm contact, you can follow up sooner (e.g., 3–5 business days), but avoid spamming.
Is a spreadsheet or a job tracker app better?
- Choose a spreadsheet if you want control, speed, and easy sorting/filtering.
- Choose an app if manual entry is your bottleneck and you benefit from workflow automation.
A hybrid approach is common: start in a spreadsheet, then move to an app when volume increases.
Can job tracker tools automatically log applications from emails?
Some tools can, but it depends on the product. For example, JobShinobi Pro supports tracking job applications by forwarding job-related emails to a unique address, where they’re parsed and logged into your tracker. (Note: email processing is Pro-gated; export is to Excel, not Google Sheets.)